A Shark Rocket vacuum is a workhorse, lightweight, maneuverable, and designed to handle stairs and upholstery without the bulk of a traditional upright. But like any hardworking tool, it needs regular maintenance to keep running at peak performance. Neglecting the filter, brush roll, and dust cup won’t just reduce suction: it can actually shorten your vacuum’s lifespan. The good news? Cleaning your Shark Rocket takes less than 20 minutes and requires nothing more than running water and a few household supplies. This guide walks you through each step, so you’ll know exactly how to maintain your vacuum and keep it pulling strong for years to come.
Table of Contents
ToggleKey Takeaways
- Cleaning your Shark Rocket vacuum regularly takes less than 20 minutes and requires only household supplies like warm water, a soft brush, and mild dish soap.
- Empty and rinse the dust cup, clean the filter system thoroughly, and remove debris from the brush roll to restore peak suction performance.
- A clogged filter and trapped hair on the brush roll are the main culprits behind reduced suction, making prevention essential for maintaining your Shark Rocket.
- Establish a maintenance schedule—empty the dust cup weekly, tap out the filter monthly, and perform deep cleaning every 3 months to extend your vacuum’s lifespan.
- Always ensure all components are completely dry before reassembling your Shark Rocket vacuum to prevent poor performance, mold, and damage to internal seals.
Gather Your Cleaning Supplies And Tools
Before you start, round up what you’ll need. You don’t need anything fancy, most items are already in your home.
What You’ll Need:
• Soft-bristled brush (an old toothbrush works perfectly)
• Warm running water
• Mild dish soap
• Lint-free cloths or paper towels
• Scissors (to cut tangled hair from the brush roll)
• Optional: A spray bottle for rinsing tight spaces
• Safety glasses (especially if you’re blowing out filter dust)
That’s it. Avoid abrasive sponges or wire brushes on the filters and plastic housing, they’ll scratch or damage the components. If your Shark Rocket has motorized attachments, you may also want a flashlight to inspect the brush head and motor areas for blockages.
Set up your workspace near a sink or outside if possible. Dust will fly when you empty the cup and tap out the filter, so don’t do this over your clean living room carpet. A bathroom or laundry room sink is ideal for rinsing components.
Empty And Rinse The Dust Cup
The dust cup is the first place to start because a clogged cup kills suction faster than anything else.
Step 1: Detach and empty the cup. Locate the release button (usually on the side or back of your Shark Rocket) and remove the dust cup. Hold it over a trash can and tap it sharply a few times to dislodge packed debris. Don’t be gentle, tapping harder actually helps.
Step 2: Rinse with warm water. Hold the cup under running water and swish it around. Pay special attention to the sides and bottom where dust clings. If debris is stuck, use your soft-bristled brush to gently scrub the interior. The cup itself isn’t fragile, but the seals and release mechanism deserve care.
Step 3: Check the seal. Look at the rubber gasket or seal where the cup attaches to the motor head. Hair, dust, and debris accumulate here and weaken the seal. Wipe it clean with a damp cloth. If the seal looks cracked or dried out, note it, you may need a replacement part, but this is rare.
Step 4: Dry completely. Shake off excess water and air-dry the cup for at least 5 minutes before reattaching. A wet cup can create a bad seal and reduce suction. Don’t reassemble until it’s completely dry.
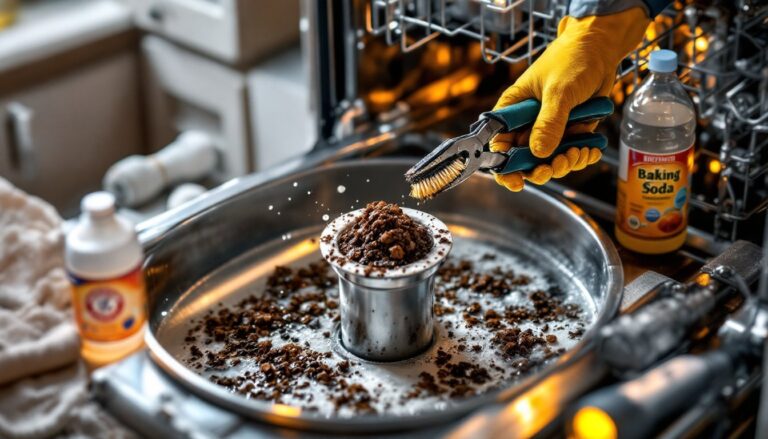
Clean The Filter System Thoroughly
Your Shark Rocket’s filter is doing heavy lifting, trapping fine dust and allergens. A clogged filter is the main culprit when suction drops.
Step 1: Locate and remove the filter. Shark Rockets typically have one or two filters (check your manual, some models have a foam pre-filter plus a HEPA main filter). Look near the top of the motor head. Press the release tabs and twist or slide the filter out gently.
Step 2: Tap out loose dust. Hold the filter over a trash can and tap it firmly with your palm 10–15 times. Tap in different directions to loosen dust trapped in the pleats. This is the single most important step, you’ll be surprised how much dust comes out.
Step 3: Rinse under running water. Hold the filter under warm water and let it run over the pleated surface. Tilt and rotate the filter so water flows through all the folds. Don’t squeeze or wring it, the pleats can tear. If water has trouble flowing through (a sign of heavy clogging), let the filter soak in warm water with a tiny drop of dish soap for 15 minutes, then rinse again.
Step 4: Check for damage. Look at the filter against the light. Tears, punctures, or large gaps mean the filter isn’t sealing properly and needs replacement. Small surface cracks are normal with age, but holes allow unfiltered dust through.
Step 5: Air-dry completely. Place the filter on a lint-free cloth or paper towel in a warm, dry spot, not in direct sunlight. This takes 2–4 hours or overnight. Never reinstall a wet filter. Moisture can promote mold and reduce filter life. Some owners run a fan nearby to speed drying.
Researchers and home care professionals at The Spruce emphasize that a dry filter is essential for vacuum performance and longevity.
Remove Debris From The Brush Roll And Airways
Hair, string, and lint wrap around the brush roll and block air passages. This is preventive work that keeps your vacuum efficient.
Step 1: Access the brush roll. Most Shark Rockets have a brush roll at the bottom of the unit. Flip the vacuum upside down or locate the base access door. You may need to press release tabs or unscrew a cover, your manual shows the exact method. Lay the vacuum on its side or upside down on a clean surface.
Step 2: Inspect the brush roll. Look for hair, string, lint, and pet fur wound tightly around the bristles. If it’s visible, it needs removal. Use your scissors to carefully cut the wrapped material. Work slowly, you want to cut the debris, not the bristles. Angle your scissors to avoid the plastic core.
Step 3: Check for clogs in the lower housing. Peer into the suction pathway beneath where the brush roll sits. Blockages here are silent performance killers. Use your finger or the handle of a soft brush to remove visible obstructions. If a hard clog exists, a straightened coat hanger or a plumbing snake (used gently) can help dislodge it.
Step 4: Inspect the motor ports. Look at the motor head area for dust or hair blocking air intake vents. Gently wipe these with a damp cloth. Blocked air intake reduces suction significantly and can overheat the motor over time.
Step 5: Ensure free movement. Manually spin the brush roll by hand (if the power is off and unplugged). It should rotate smoothly. If it’s stiff or sticky, there’s likely still debris trapped. Repeat steps 2–4 until the brush rolls freely.
Dry And Reassemble Your Vacuum
Now that each component is clean, reassembly is straightforward, just reverse what you took apart.
Step 1: Confirm everything is dry. The filter is your main concern. Touch it to confirm. A damp filter will cause poor performance or even odors. If there’s any doubt, wait another 30 minutes.
Step 2: Reattach the brush roll and access door. Slide or twist the brush roll back into place (it typically has a specific orientation, check that bristles face down). Secure the access door with screws or tabs until snug but not over-tightened. Over-tightening plastic screws can strip threads.
Step 3: Reinstall the filter. Place the filter back into its housing. Twist or align it as required and push firmly until you hear or feel a click. A loose filter won’t seal, and suction will suffer. Some models have a release tab you’ll push or twist to lock it in place.
Step 4: Reattach the dust cup. Align the cup with the motor head (guides are molded in) and push upward firmly until the cup locks in place. You’ll typically hear a click. Pull the cup gently to confirm it’s secure, a loose cup will reduce suction.
Step 5: Test suction. Plug in the vacuum and run it for 10 seconds over a clean surface. You should feel noticeably stronger suction if the maintenance was successful. Listen for any unusual noises, which might indicate a filter or brush roll isn’t seated correctly.
Maintenance Tips To Keep Your Shark Rocket Running Like New
Cleaning your vacuum once is great. Keeping up with regular maintenance prevents performance drops and extends the unit’s life.
Weekly: Empty the dust cup after each use, especially if you vacuumed pet hair or high-traffic areas. A full cup chokes suction immediately.
Monthly: Tap out the filter and brush roll quickly (even if you don’t do a full rinse). This takes 2 minutes and maintains peak performance between deep cleans.
Every 3 months: Do a full filter rinse and brush roll inspection like you just learned. Depending on your home (pet hair, high traffic, or allergies), you might increase this to every 4–6 weeks.
Annually: Order a replacement filter if yours shows wear, cracks, or reduced water flow during rinsing. Filters typically cost $15–$40, depending on your Shark Rocket model. Budget-conscious owners can extend filter life by pre-filtering heavy debris with a broom, so less dust reaches the vacuum filter. For anyone serious about keeping their vacuum in top shape, resources like Good Housekeeping’s appliance reviews and Today’s Homeowner maintenance checklists offer additional guidance on seasonal care and troubleshooting.
Storage: Keep your Shark Rocket in a dry spot. Moisture and extreme heat degrade seals and motor components. Coil the cord loosely (don’t kink it tightly) to avoid damage.
One final tip: Track when you last cleaned each part. Jot a date on the filter with a dry-erase marker or make a note on your phone. You’ll be less likely to skip maintenance when you see it in print. Your Shark Rocket will reward you with years of reliable, powerful suction.
Conclusion
Cleaning your Shark Rocket isn’t a chore, it’s the difference between a vacuum that works and one that just goes through the motions. Five simple steps, minimal tools, and 20 minutes every few months keep your machine strong. Follow this routine, and you’ll maintain the suction power and performance you paid for. Your floors, and your vacuum, will thank you.